Blog |
Note: Ensure there are no variances in height between the two transition flooring surfaces. Refer to our Design Guide for advice on how to raise the level of a subfloor for a flush transition.
Contents
- Timber to carpet
- Timber to timber
- Timber to tile
- Timber to polished concrete / garage floor
- Timber to joinery
- Timber to front door
- Skirtings

Timber to carpet
If required, you can install an MDF ramp beneath the carpet to smooth any difference in heights.
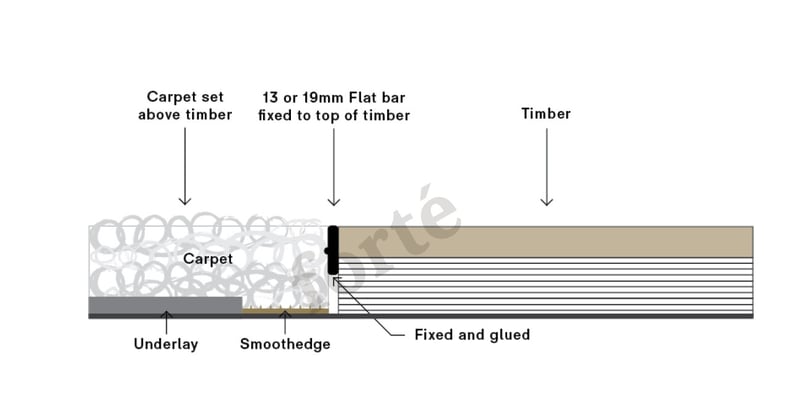
Transition with insert (recommended)
When the flat bar is installed along the edge of the timber it creates a protective edge for the wood which reduces the risk of damage and provides a quality finish.
Design requirements: The top of the flat bar should be set level with the top of flooring.
Transition with no insert (recommended)
It is also possible to transition to carpet with no flat bar, however it becomes even more important to set the carpet height correctly as when the carpet settles, the edge of the timber has no protection, and may chip off if heavy objects are dragged across the transition.
Design requirements: The pile of the carpet should be set a little higher above the timber floor as the carpet pile will settle and potentially leave the timber edge exposed without protection.
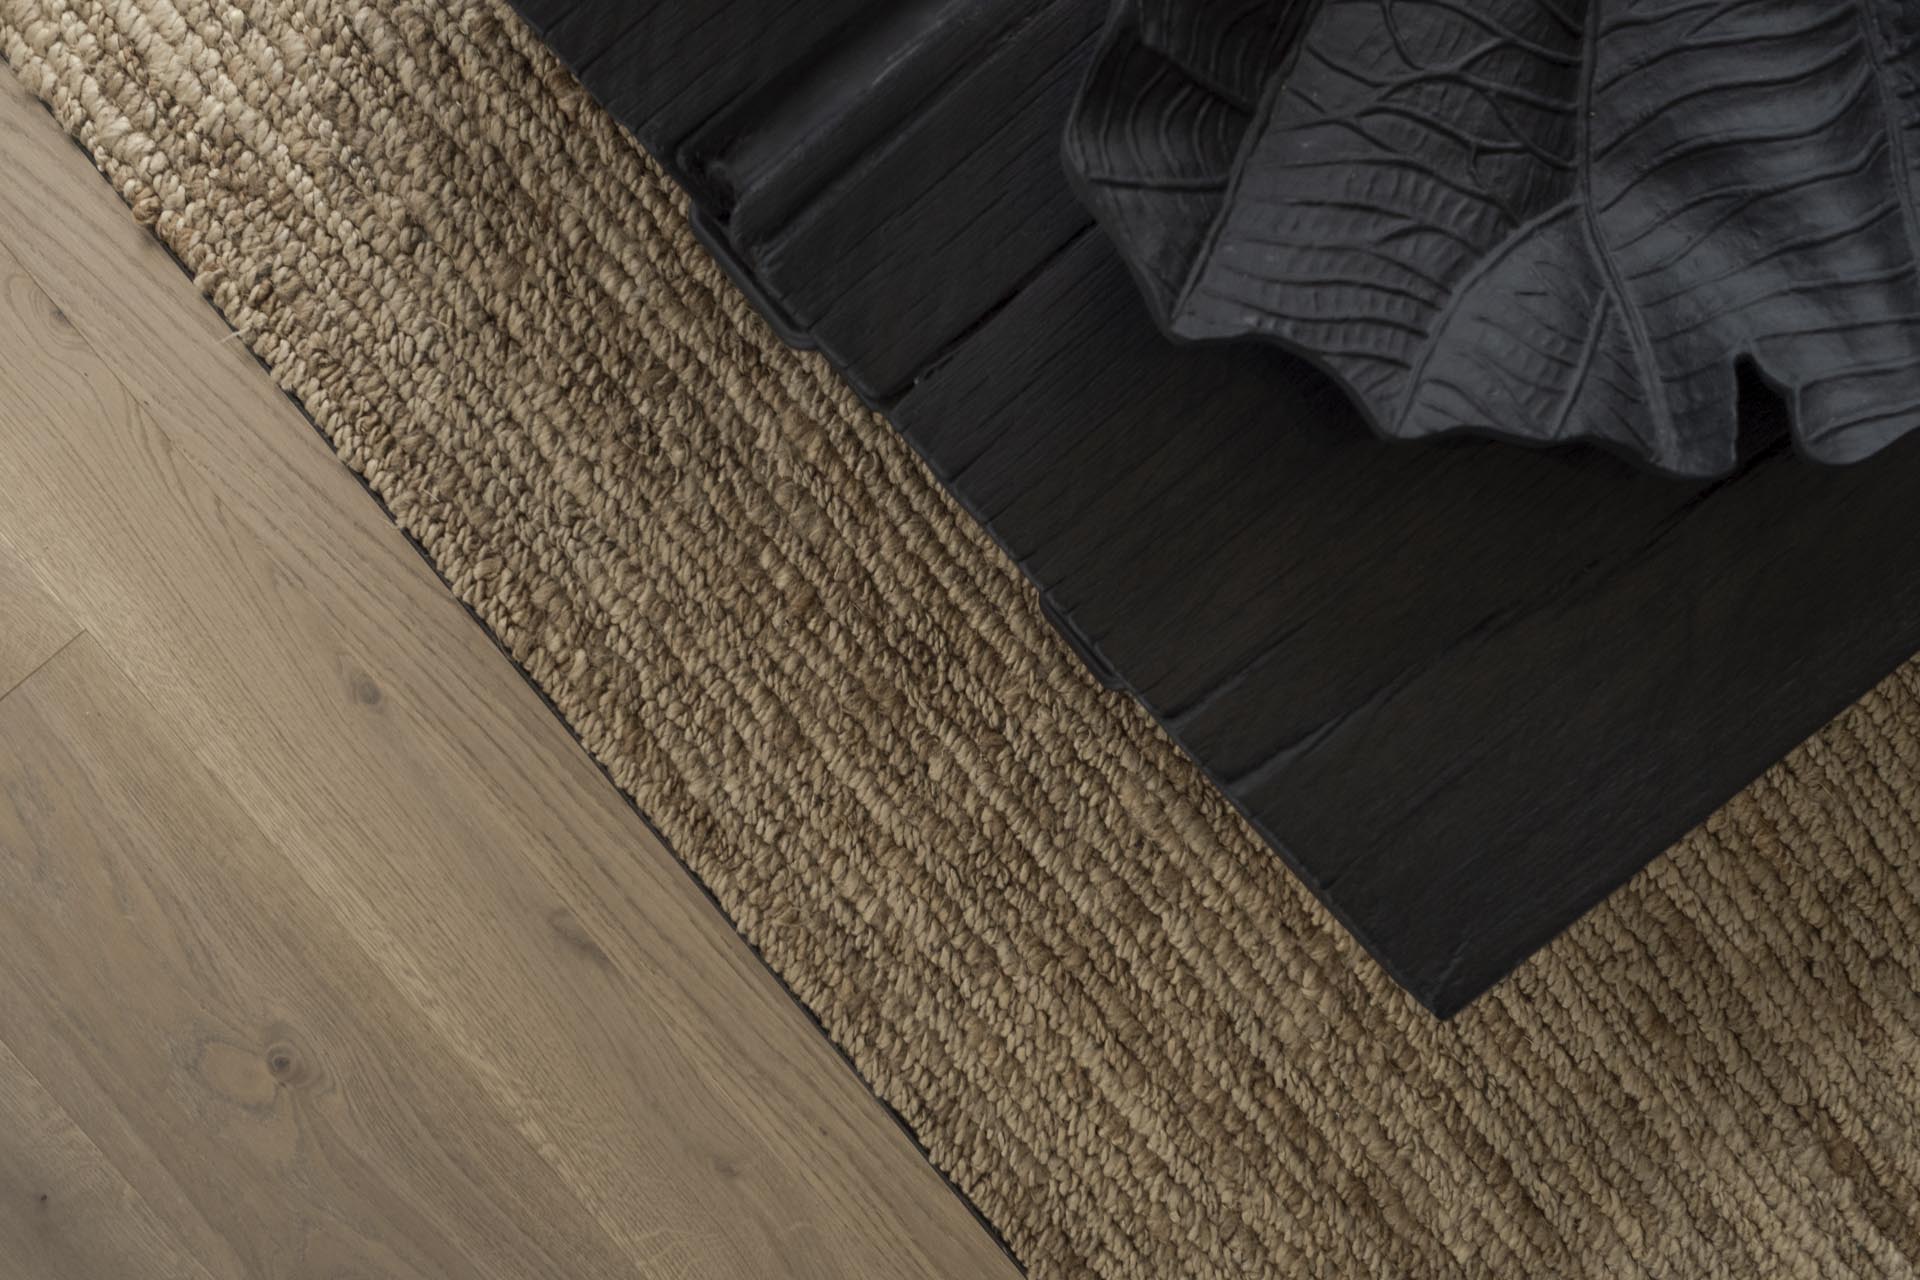
Timber to timber (border or flooring direction change)
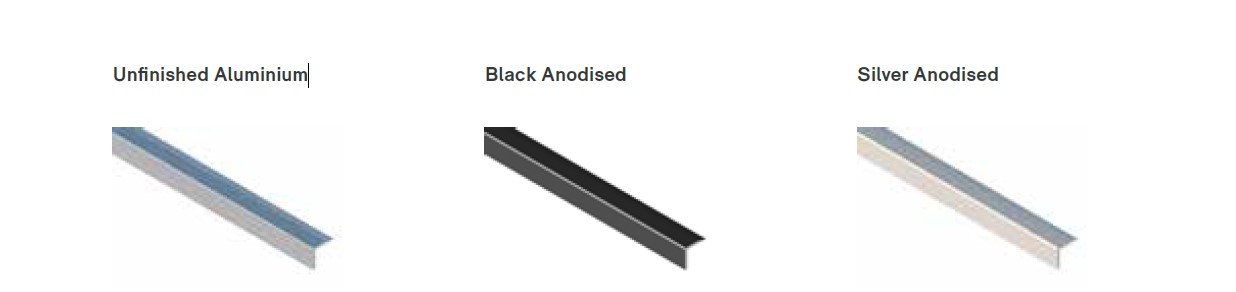
For transitions using an insert, we recommend using an extruded Flat Bar for the most quality finish and appearance.
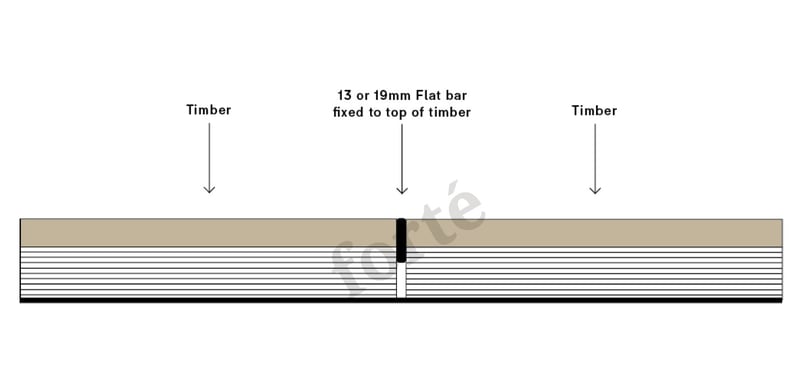
Transition with insert
Transition with no insert
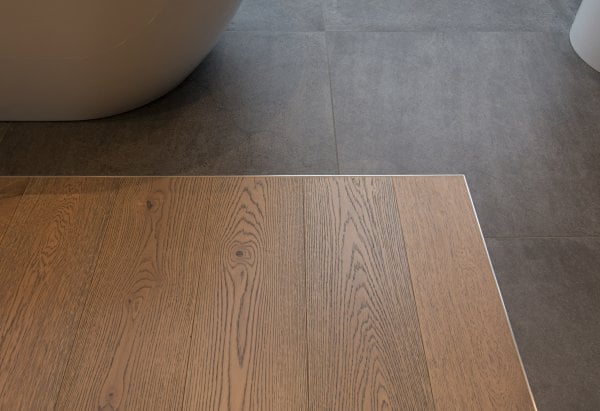
Timber to tile
Note: The height of the transition should be considered prior to installation.
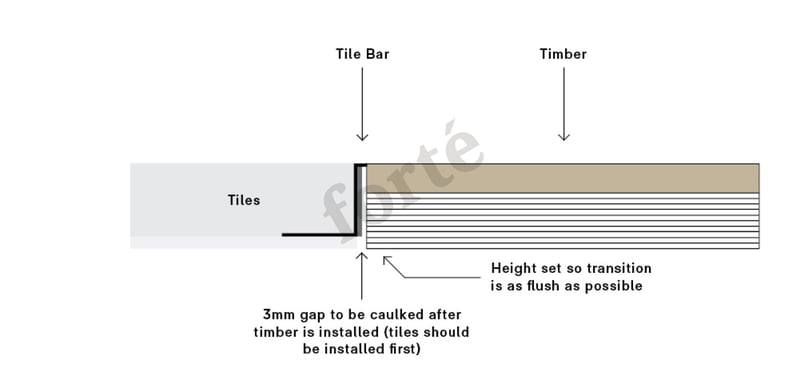
Transition with tile bar (recommended)
The silicone colour should match the colour of the flooring or the tile bar for ideal aesthetics. The tile bar colour should be selected to best match the space (black/silver/brass etc.)
Alternative method
The silicone colour should match the colour of the flooring or tile grout for ideal aesthetics. This is ideal for a curved transition or where a transition bar does not look good aesthetically.
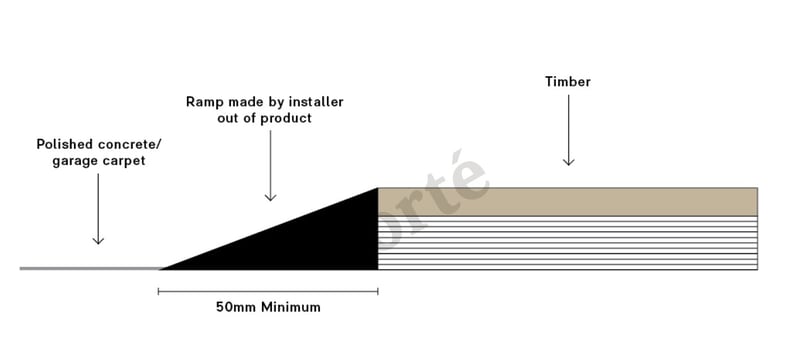
Timber to polished concrete / garage floor
Design requirements: Experienced installers can make a ramp from the product being installed for a perfect colour match. Where possible, ramp down in an inconspicuous place like a doorway.
Timber to joinery
Refer to our website for all angle trim options and availability.
Ranch slider with angle trim
Design requirements: Use a slim 13mm aluminium angle trim that is powder-coated to match the colour of the aluminium joinery.
Timber to front door
Front door with timber sill removed (recommended)
Design requirements: The wood floor will need to be installed leaving a 2–3mm gap between the adjoining surfaces and finished off with a coloured caulking that matches your flooring.
Front door with timber sill
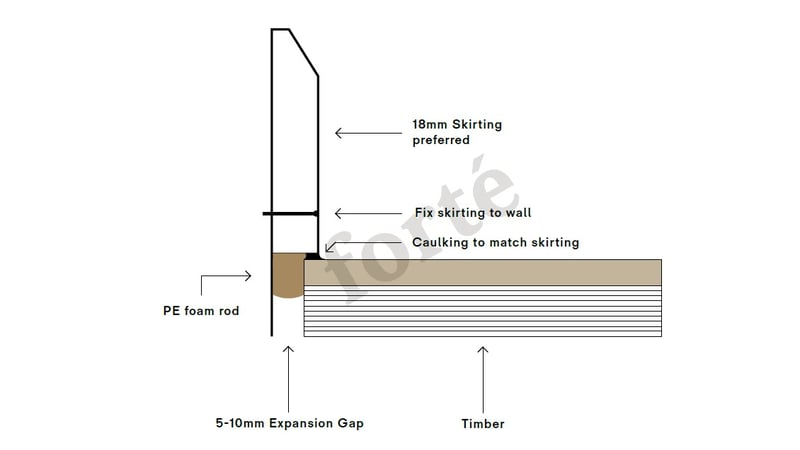
Skirtings
Floor to wall with skirting
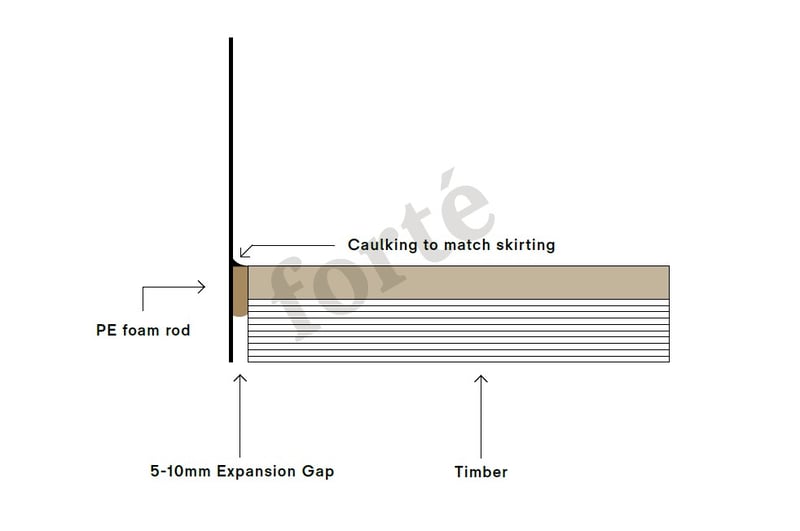
Floor to wall without skirting
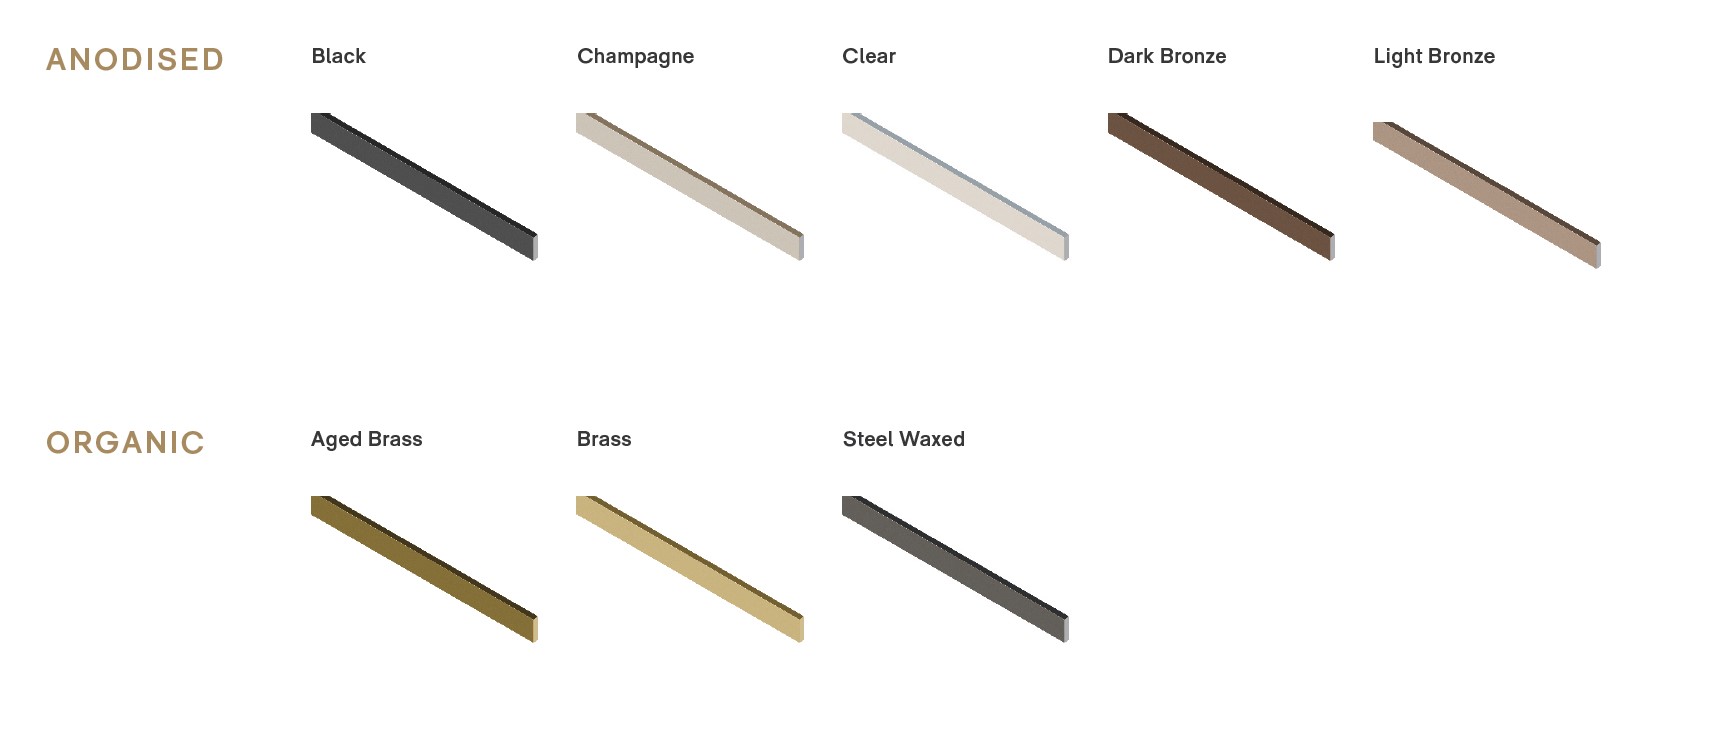
Add a sophisticated finish to your project with our collection of architectural finishes and trims. Refer to our website for all trim options and availability or read more in our Design Guide.